Table of Contents Show
Many people across the world use Gmail as it’s efficient and user-friendly. However, no matter how efficient Gmail is, but still it encounters some sort of technical issue on both Android & iPhone devices. In some cases, Gmail doesn’t load new emails on Android, and in other cases, Gmail keeps crashing on iPhones. If you are one who suspects the same issue don’t worry it’s common and handy to fix the problem.
Being able to fix such a type of issue in a timely manner is good, especially if you are using Gmail for professional use. Luckily you can do so, by simply performing the given troubleshooting steps to fix Gmail issues.
Gmail Not Working on iPhone & Android, What To Do?
What Causes Gmail Not Working?
Gmail not working on iPhone or Android can occur from both Google and users’ sides. On the user side it can be due to corrupted internet, a poor configuration in settings in Gmail, or else a forgotten password. On the Google side, low Gmail server, a corrupted update file, and more.
Restart Your Device
Restarting the device is pain healing method to fix any kind of minor bugs in the device. If a minor glitch in the Gmail application is the reason why Gmail not showing notifications? restarting the device might work.
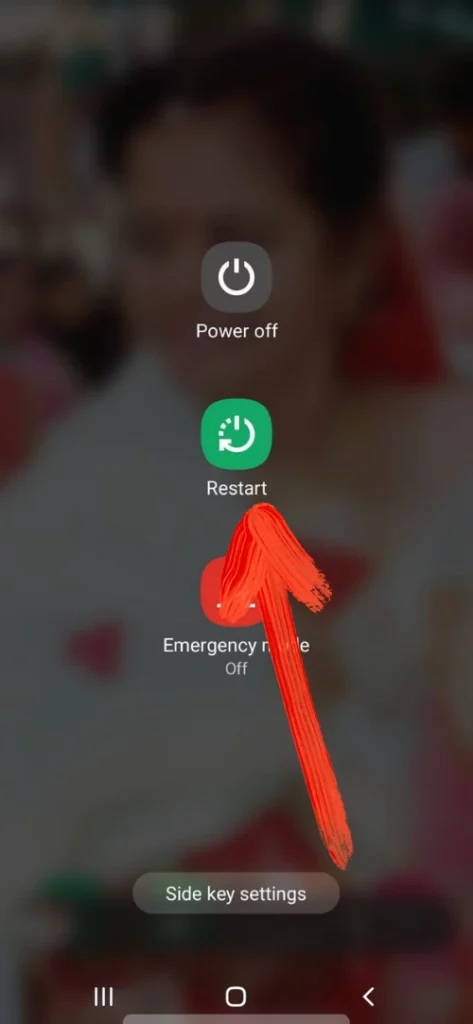
To Restart Android,
- Press the Power Button to feature Power Off Menu.
- Right from the Power Off Menu choose Restart.
- Wait until the device restarts.
For iPhone X, 11, 12, 13 or Newer,
- Press the Power button + Either Volume Buttons to feature Shutdown Screen.
- Move the slider to the right to turn it off. Wait for a while and turn the device ON by pressing the Power button.
For iPhone SE ( 2nd or 3rd Generation), 8, 9, 7, 6,
- Press and hold the Power Button until the Power Off slider appears.
- Move the slider to the right to turn it off. Hold for a few seconds and turn it ON by pressing the Power Button.
Check Internet Connection
This seems to be obvious, ensure that your device has an active internet connection. For example, it’s feasible that your home or office Wi-Fi offers a strong connection but there is no internet being transmitted. To verify, open another website or application that isn’t working. If not, then report the problem to the internet service provider.
In the case of cellular data, first of all, verify that your current location offers a strong range of networks to run Gmail. And if it offers a good range of networks, then contact the to cellular data provider and verify your data plan, as it might be expired.
Verify Gmail Server
Before performing any high-end performance, it is good to verify the Gmail server. Because if there is any big outrage in the Gmail server, then no workaround will help to fix Gmail not receiving emails on Android.
For this, you need to head towards Downdetector and look at why Gmail is not working today? And If most of the users ask for the same problem in the comment box. Wait until Google fixes the problem itself.
Force Stop Gmail App
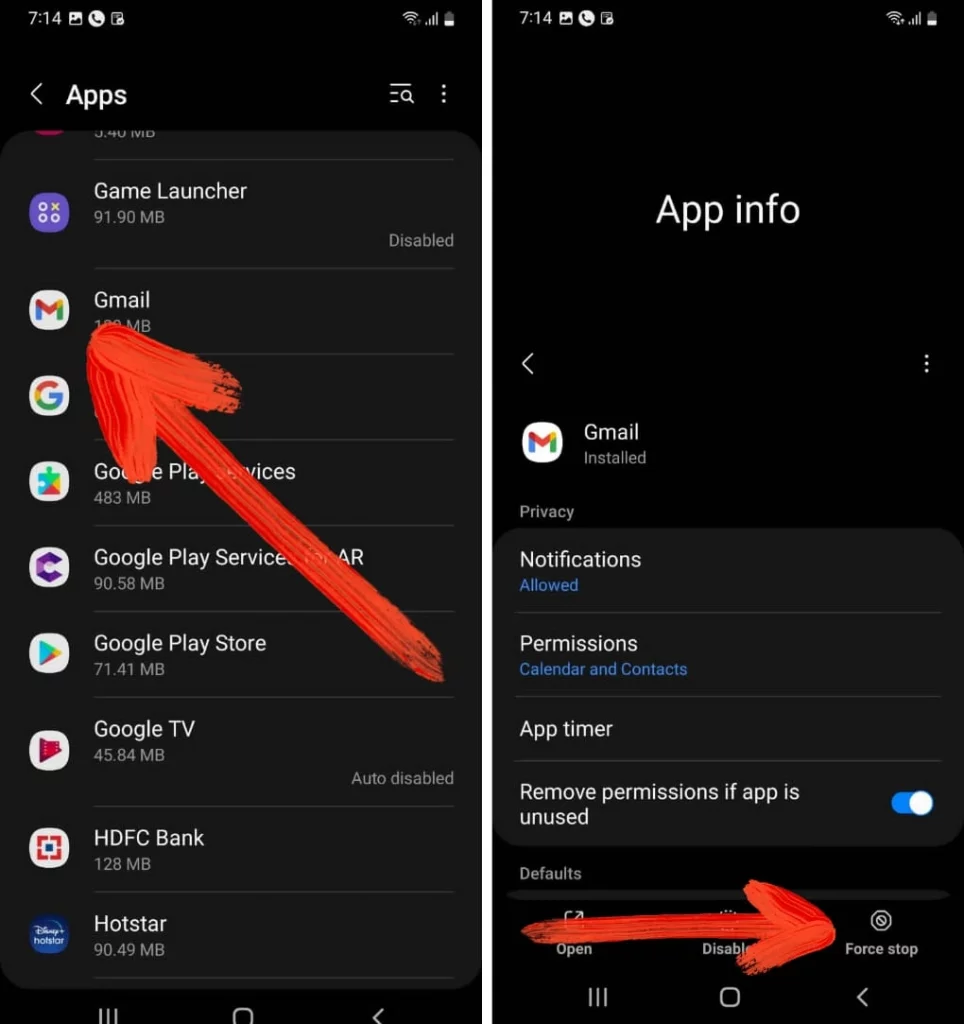
If Gmail isn’t working, as usual, the most common thing you need to do is force quit the Gmail application. As it kills the currently running instance of an application. To do so, simply follow the given below steps.
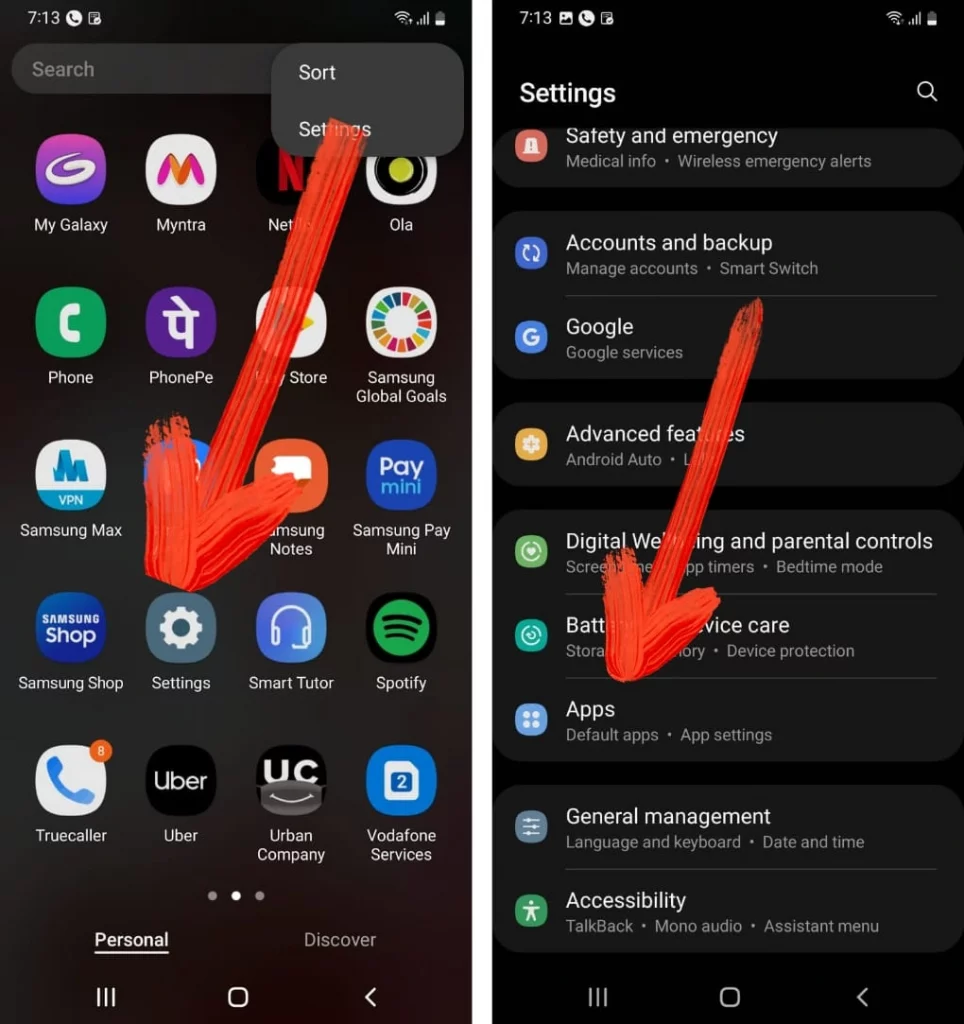
For Android,
- Navigate to the Settings > Apps.
- From the list of apps, select Gmail > Force Stop.
Perform Captcha Reset
As Google is well known for its privacy features, Google deactivates Gmail if it’s found on new devices or unfamiliar location, it doesn’t allow users to use the account until deactivates or unlocks the Captcha. Here are the steps to do so.
- Tap on Google Captcha Reset Page.
- Log In with your Gmail ID.
- Hit Continue.
Navigate back to the Gmail App and see if you can use the Gmail app on your device.
Clear Gmail Cache (Android)
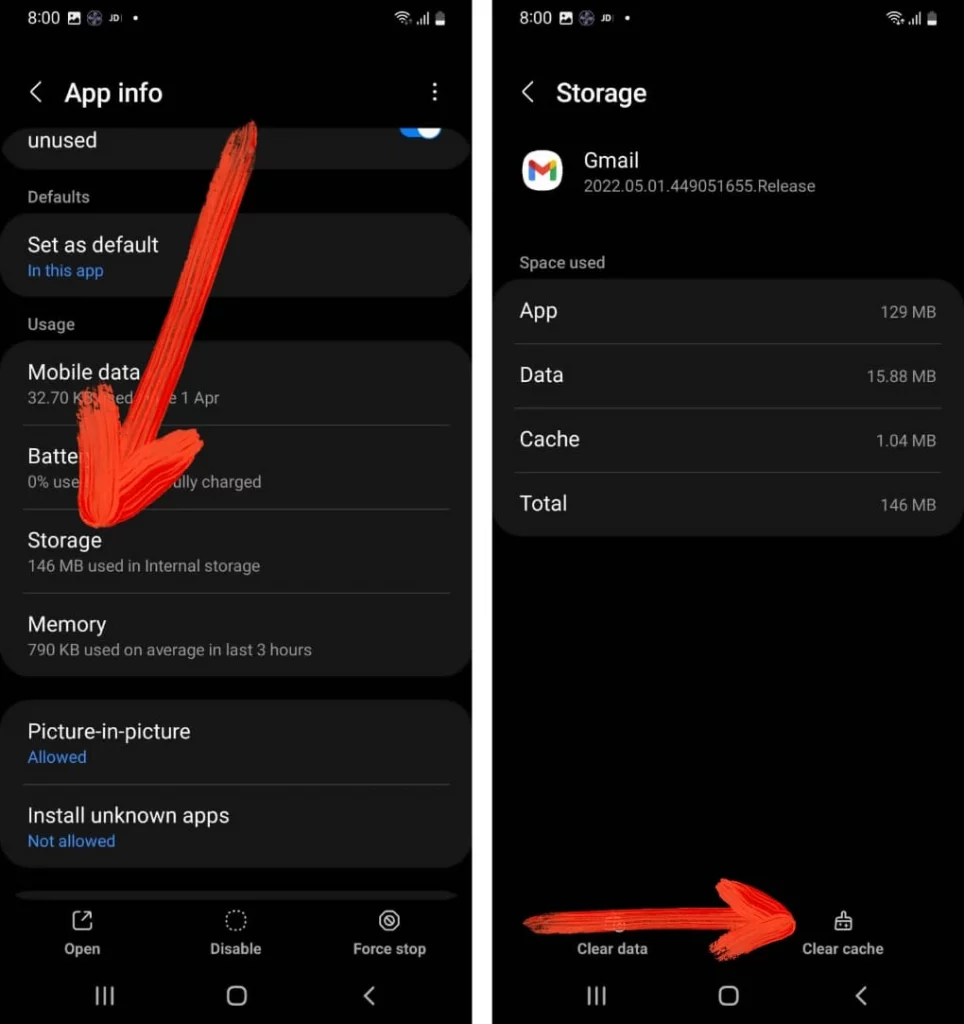
When you haven’t synced mail for the past 20-30 days; can result in the gathering of a large cache file. This cache file helps the application to load faster, but over time it might get corrupted and ultimately causes Gmail not loading new E-mail. To fix it, it’s better to clear the cache of the Gmail application.
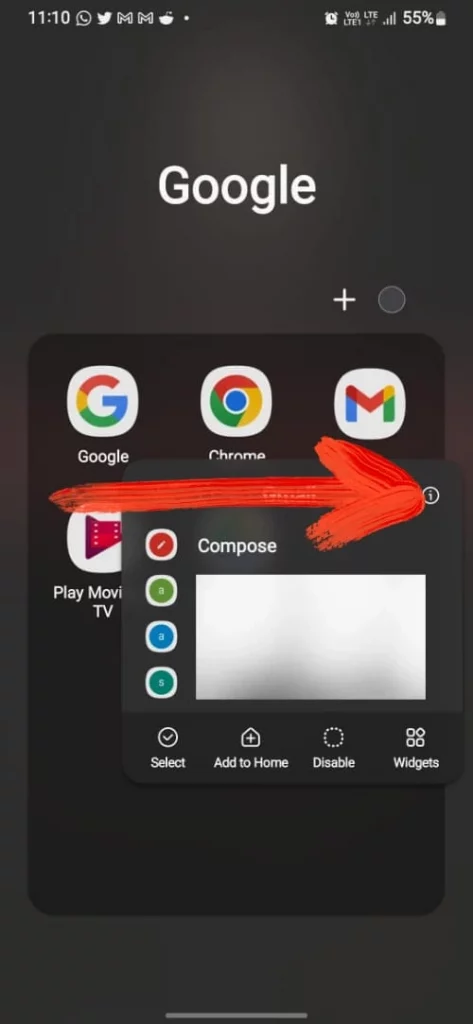
- Long tap on the Gmail App > App Info Symbol.
- Choose Storage > Clear Cache.
Clear Webview Cache ( Android)
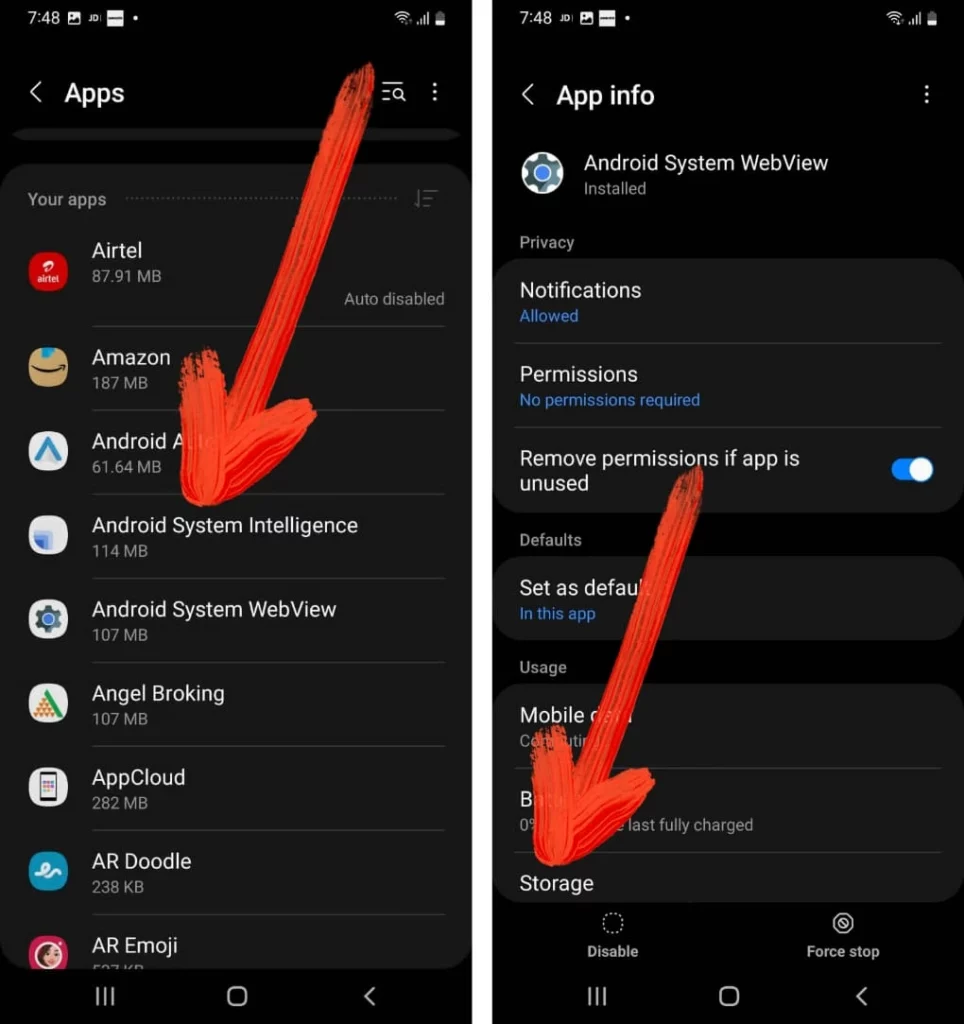
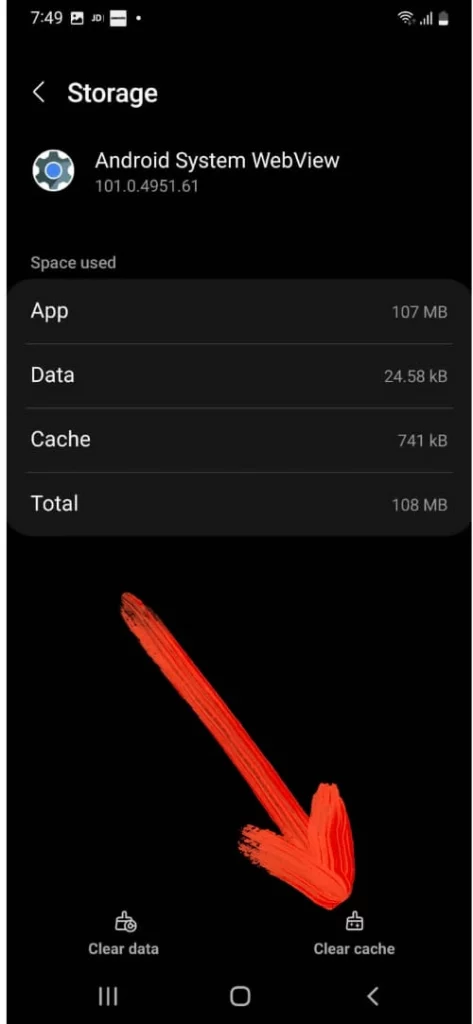
What is Android System Webview? Well, it’s a pre-installed component of Google that allows the Android application to feature its web content. And if this Webview gets corrupted then it can lead to several application-based problems on the device. So clearing its cache regularly can help to prevent the problem.
- Navigate to the Settings > Apps.
- From the list of Apps select Android System WebView > Storage.
- Hit Clear Cache.
Update Gmail App
Now it’s time to verify if there is any update released or pending for the Gmail app. The update is normally launched to enhance the performance and to fix those minor bugs. Hence, if there is an update available, UPDATE IT!
For Android,
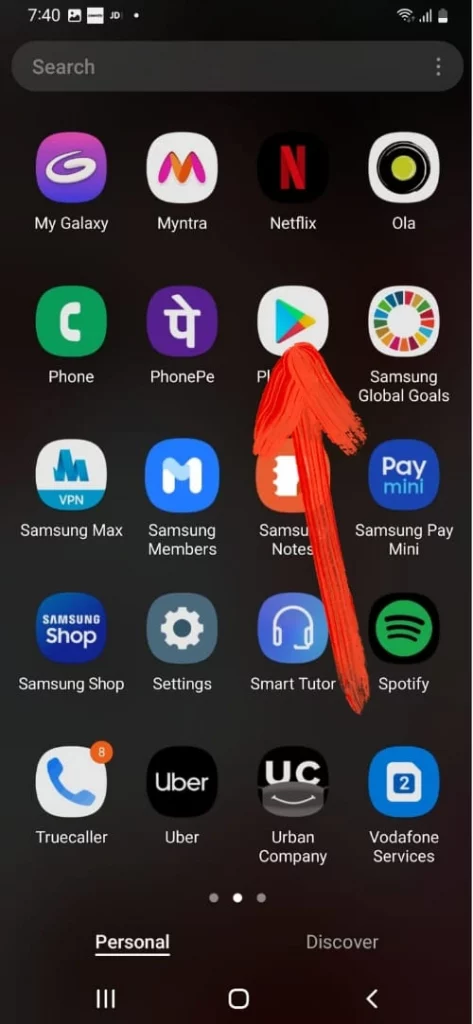
- Navigate to the Google Play Store.
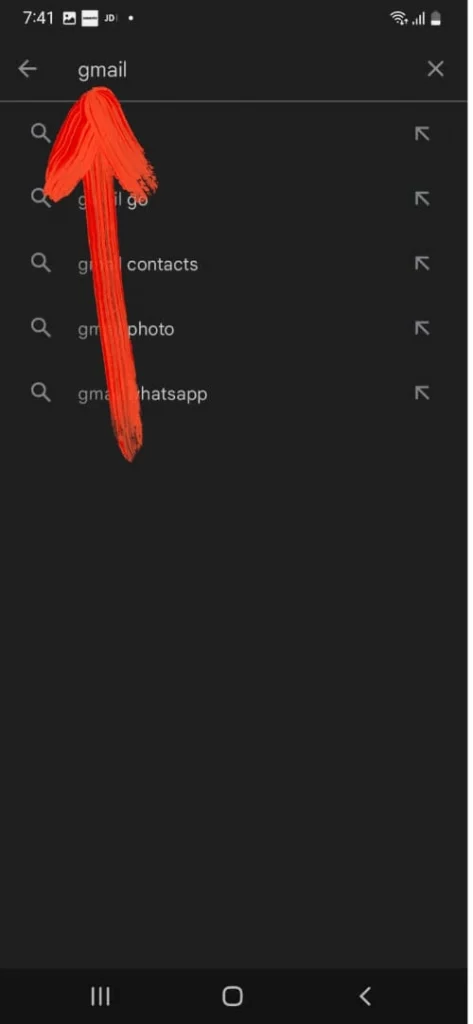
- Right in the search box type Gmail.
- If available, tap on Update.
For iPhone,
- Navigate to the App Store.
- Hit on the Profile Icon present at the top.
- Swipe down to see pending updates. Hit Update next to the Gmail App or else Update All to update all app at once.
Sign-Out And In Gmail Account
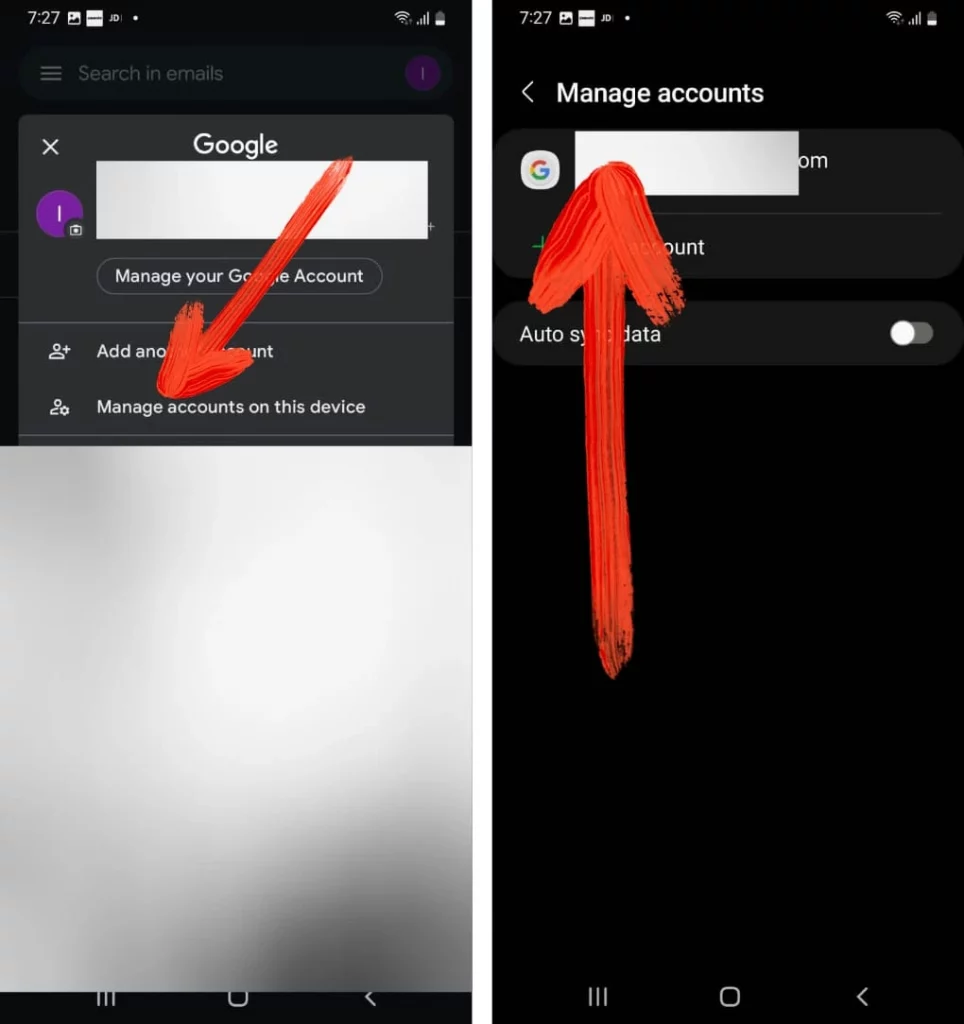
If still Gmail not receiving new emails, you can simply try removing the Gmail account and adding it once again. Doing so will refresh the connection with a server and might fix the problem.
For iPhone,
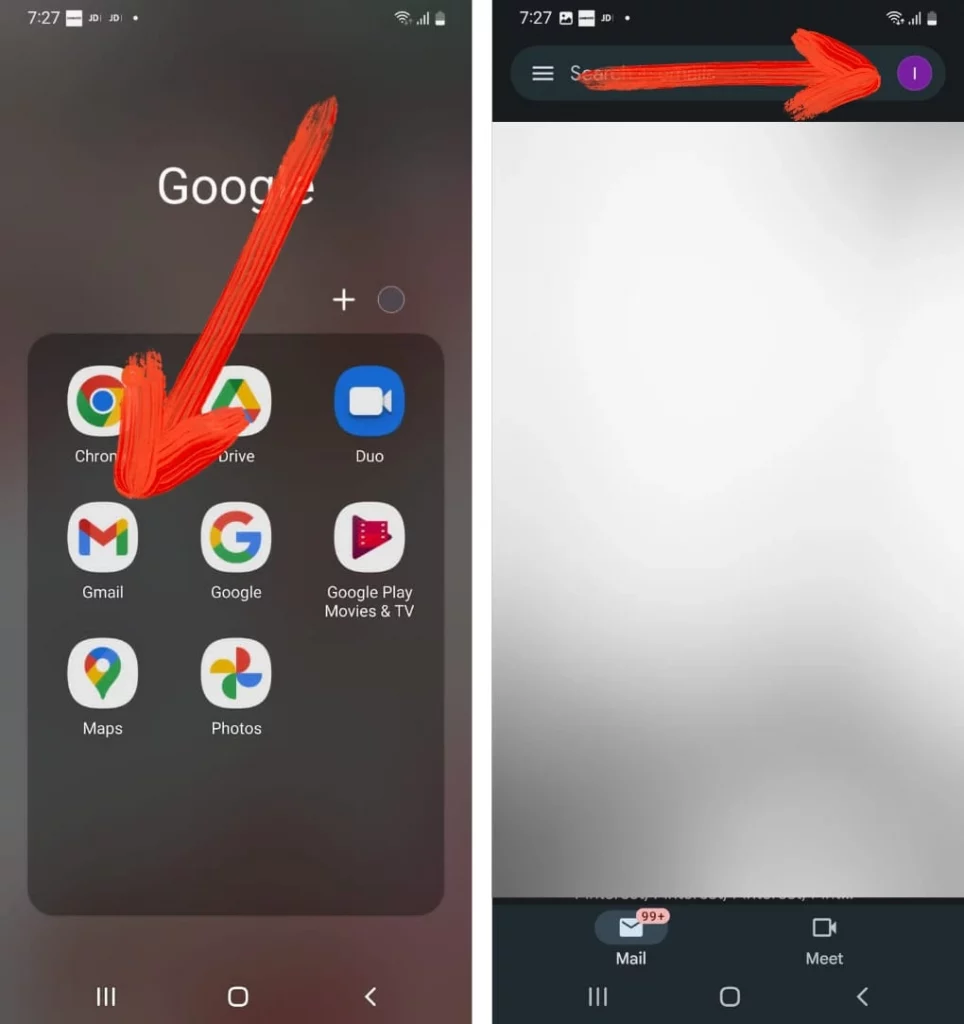
- Navigate to the Gmail App.
- Tap on the Profile Icon present at the top right.
- Select Manage Account On This Device > Remove From This Device.
For Android,
- Navigate to the Gmail App > Profile Icon present in the top-right corner.
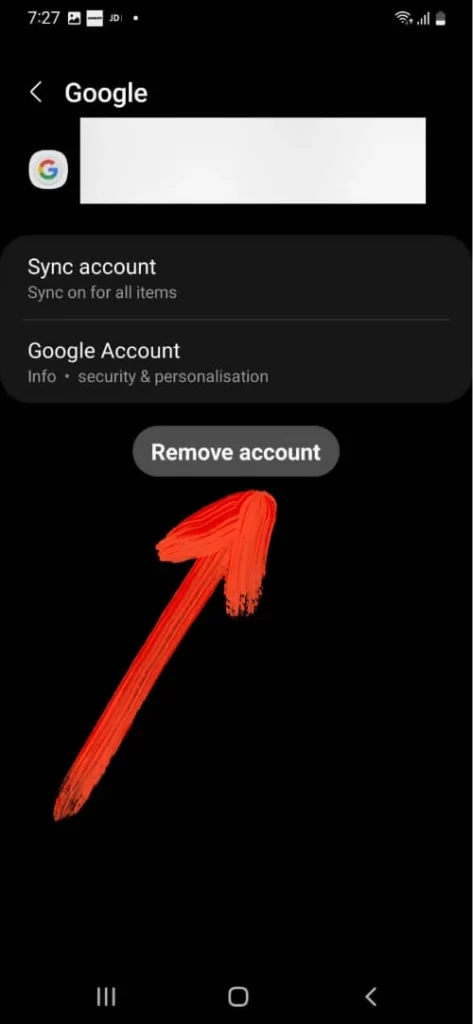
- Select Manage Account On This Device > Google ID.
- Lastly, hit Remove Account.
After this simply add your Gmail account once again and see if you are able to receive new emails on your devices.
Ensure IMAP Is Enabled
One of the most common reasons Gmail stopped working on Android or iPhone is due to IMAP disabled. IMAP is an Internet Message Access Protocol that offers a handy way to share the account from your smart gadget. Usually, if IMAP feature is disabled; Gmail not showing up email on iPhone will take place.
- Navigate to the Browser and go to your Gmail Account.
- From the Gmail account, select Setting Gear Icon present at the right top corner.
- Choose Select All.
- Click on the Forwarding And POP/IMAP tab.
- Swipe down right to the IMAP Access.
- Click on Enable IMAP.
- Lastly, choose Save Changes.
Get Back Your Gmail!
Most of the users get their Gmail to a normal mode after performing the above-mentioned workaround. Hopefully, you might also!
More Posts,
