

Table of Contents Show
Instagram Stories are a great way to share a glimpse of your trip or birthday with your followers. Facebook has upgraded Instagram to another level by adding promoting tools and allowing the small and large scale businesses to advertise and grow on one of the most emerging social platforms. However, Instagram is a mobile-only platform; presently, there is no full-featured PC version of Instagram available like Facebook.
Indeed, there are few workarounds available to post an Instagram Story and Posts from PC and Mac; with this trick, you can post anything from the computer. Furthermore, few third-party tools also facilitate social accounts in one place, but they are paid. Let’s see how to post Instagram Stories from Mac and Windows.
How to Post Instagram Stories using Windows and Mac
Switch User-Agent in Chrome Browser
This is the most straightforward way to post Instagram Stories and Post from the Windows PC and Mac. The subtitle sounds weird, but this workaround doesn’t require any expertise to post any media to Instagram. Indeed, without using any third-party tool or software, you can instantly post stories and photos to Instagram.
While it is only possible with the Google Chrome browser, Safari, or any other browser, won’t do any trick. Make sure your PC or Mac, have Google Chrome downloaded.
- Go to Chrome on your PC.
- Press the Control + Shift + J on Windows PC and Command + Options + J on Mac to launch the Developer tools.
- From the Developer tools, click on the “Toggle device bar” button, which looks like Tablet and Mobile.


How to Post Instagram Story using Safari App on Mac
If you’re using the Safari browser to post stories on Instagram, the Mac requires Portrait Orientation. Tweak the display settings on Mac and then try to post on Instagram.
- Launch the Safari on Mac.
- Click on the Safari and select Safari Preferences. Choose Advanced and enable Show Develop menu in the menu bar.
- Without the Developer menu, you cannot switch the User-Agent.
- Now, hover the cursor on the Develop option in the top menu bar.
- Click on the User-Agent.
- And select Safari – iOS 11.3 iPhone or iPod Touch. You should see a minimalist iPhone or iPod screen on Mac.
- Search Instagram on Safari.
- Enter the username and password to log in.
- Here’s a twist, turn on Portrait mode on Mac to post the story.
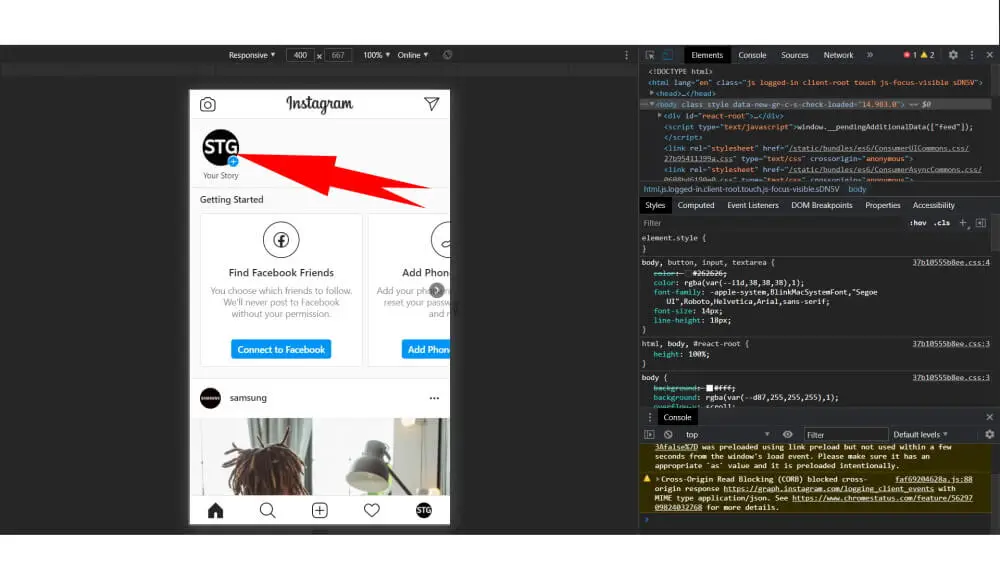
- Click on the Your Story button and post the Instagram Story like you always do on iPhone.
Use Third-Party Apps
There are plenty of third-party tools available for PC, equipped with all sorts of Instagram tools you ordinally get in the Instagram app. Many small and large businesses use these tools to run their business accounts and promote products on the Instagram app, just because uploading media in bulk on PC is way quicker than doing the same on the Instagram app.
Bluestacks
Bluestacks offers the same set of tools and necessary features that you would need to run a business and social account. It’s an Android Emulator, therefore, you would need to use Google Account with it. However, if you’re looking to run multiple social accounts and want to post media in bulk, Bluestack is not for you, try Hootsuite. Bluestacks is free to download. Try Bluestacks
Hootsuite
Hootsuite is especially designed for the entrepreneurs and business purpose to handle multiple social accounts right away from the computer. If you’re in need of such a tool, don’t miss Hootsuite. It is a paid app, though. Try Hootsuite
HopperHQ
HopperHQ is a place to manage Instagram, Facebook, Twitter, and LinkedIn accounts, its price varies per account, for instance, it can let you use all the four social accounts at the cost of $19/mo or $16/mo(billed annually). Scheduling, Bulk Upload, Grid Planner are the key features of HopperHQ. Try HopperHQ
More Posts,