
Table of Contents Show
Wi-Fi is slow on iPhones but not on other devices; this is the most annoying question; every iPhone user has searched to look for a permanent fix. However, if you don’t know the exact solutions, it’s difficult to figure out why Wi-Fi is running slow on your iPhone after the update and how to speed up your iPhone Wi-Fi. There can be many possibilities and solutions to deal with this; we’ve covered the best workarounds that have helped other users fix the iPhone slow Wi-Fi connection on iOS 16.
Fix Slow Wi-Fi on iPhone after Update
1. Did you change Router’s Position?
Usually, the best place to put router is under the television since it’s the center of hall, for most people. If you have changed the router’s position, make sure it is in the center. On top of that, avoid putting router near the refrigerator, oven, or on heavy machinery, as it interferes with the network.
2. Check Router’s Compatibility
In the world of high-speed fiber connections, make sure to check your router is compatible with the internet speed. Sometimes, the old router is not capable to deliver high-speed internet with old hardware configurations.
3. Optimize Router’s Settings
With new technologies and improved hardware, router’s settings can be optimized as per the requirement. Go check the router’s website to check where and how to change the settings.
4. Toggle Airplane Mode
When it comes to network-related issues, Airplane mode gives easy resolution to each and every problem. Just bring the Control Centre on the screen and tap on Airplane Mode to enable it. Up next, wait for a few seconds, and tap on Airplane mode to disable it. This will refresh the network connection.
5. Force Reboot iPhone
For iPhone 8 or newer:
- Press and quickly release Volume Up button.
- Press and quickly release Volume Down button.
- Lastly, hold down Side button until Apple logo appears.
For iPhone 7:
- Press and hold Volume Down and Sleep/Wake button until Apple logo displays.
For iPhone 6 or earlier:
- Press and hold Home button and Sleep/Wake button until Apple logo shows up.
6. Check Wi-Fi Error on iPhone
Do you see any Wi-Fi recommendations in iPhone Wi-Fi Settings? Unsecured Network, Weak Security, Security Recommendation, and No Internet Connection are the Wi-Fi recommendations iPhone could show in case of any error.
You can accordingly act upon the Wi-Fi and fix the issue.
- Go to the Settings app in iPhone.
- Tap Wi-Fi.
- Look for any message as mentioned above.
7. Check for Updates
Did you check for software updates? Make sure to check what iOS version you’re running right now or is it the updated version for your iPhone?
- Go to the Settings app.
- Tap General.
- Select Software Update.
- Give sometime to iPhone to check for updates, and download & install updates if available.
Reboot the device after update, and check if Wi-Fi issue is fixed or still persists.
8. Forget Wi-Fi
You may be using the Wi-Fi for very long and over the time, the network could get corrupted. To resolve this, forget the Wi-Fi and enter password again and observe if it worked or not.
- Go to the Settings app.
- Tap Wi-Fi.
- Tap on (i) next to Wi-Fi connection that you want to forgot.
- Select Forget This Network.
- Confirm, Forget This Network.
- Restart iPhone and reconnect to Wi-Fi by entering the password.
9. Reset Network Settings
This is one tap solution to fix the corrupted network settings, including Wi-Fi, Bluetooth and APNs. Since the iPhone Wi-Fi speed is very low, you may try this out. It will erase saved Wi-Fi passwords and Bluetooth devices, but all of your apps and personal data is safe.
- Navigate to the Settings app.
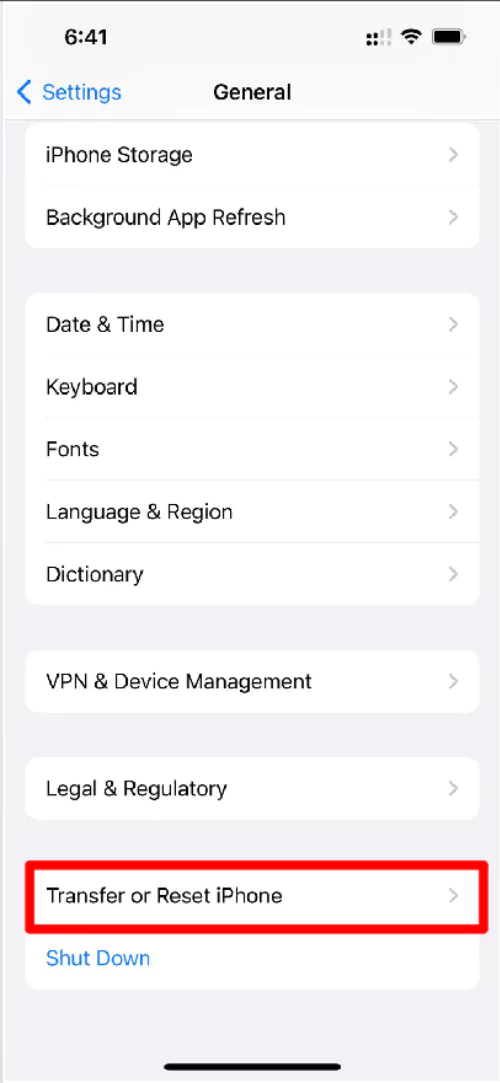
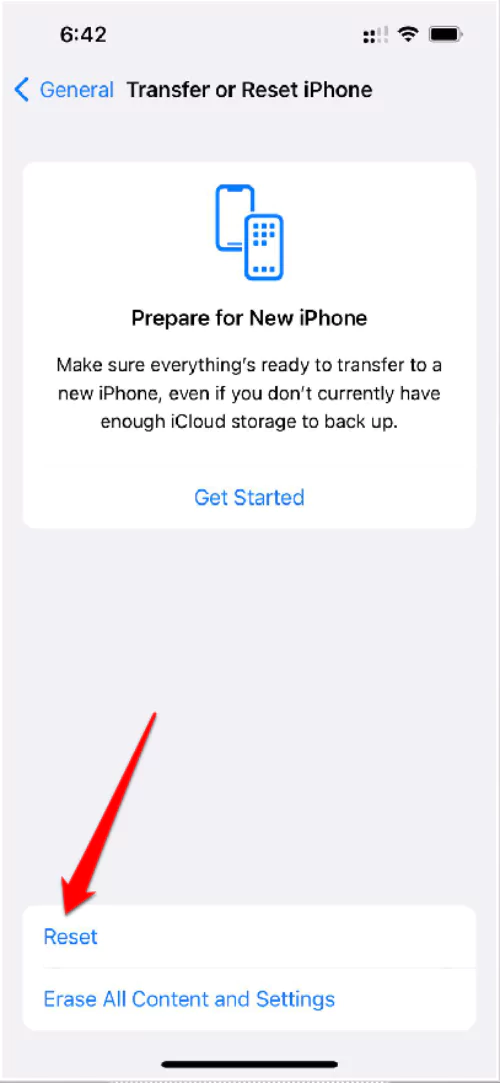
- Select General.
- Tap Reset > Reset Network Settings.

- Enter the passcode to confirm the reset network settings.
10. Turn Off Networking & Wireless
For some users disabling Networking & Wireless settings have fixed the slow Wi-Fi connection.
- Open Settings app.
- Select Privacy and then tap Location Services.
- Tap System Services and disable Networking & Wireless.
11. Change iPhone DNS
Domain Name System (DNS) plays very vital role in internet connectivity. While, there are two popular and most used DNS available, you can opt for anyone. Google DNS (8.8.8.8 & 8.8.4.4) which can be entered as, for IPv6: 2001:4860:4860::8888 and/or 2001:4860:4860::8844 and OpenDNS (208.67.222.222 & 208.67.220.220). Here’s how to change DNS Server manually on iPhone to speed up Wi-Fi connection.
- Go to the Settings app.
- Tap Wi-Fi.
- Select (i) next to Wi-Fi connection.
- Locate and tap Configure DNS.
- Change settings to Manual.
- Enter the DNS manually, either Google DNS or OpenDNS and tap Add Server.
- Once you’re done, tap Save.
Final Thought!
As you can see, there are various reasons why the wi-fi is slow on your iPhone. Luckily, fixing them is handy.